Pages

Wednesday, 29 March 2017

Adorable Fingerless Gloves


I bring new and adorable stylish fingerless gloves for you. This is special for spring season and wearing for other occasions, when you to wear colorful outfits and you wear the chunky gloves too you are looking a great personality to others. this is a best choice for the girls who are going to schools and out in the morning for their other works when her hand are cover with a beautiful  fingerless gloves she feel better than working.
 Anyway today I get to share my pattern the fingerless gloves. This perfect violet color is favorite color of all those who love and want to carry wonderful bright colors to match their outfit I hope you will be enjoy this easy pattern and follow to make for your own or gifted to others in many occasions. It can be easy to change in other sizes; it is the medium size gloves to fit in normal hands I made a head band to match the gloves.

I making different things whole of the year, I made many of the things for home decors, some of the baby design and many of the adult. I made many of the glove design and share with you; I hope this pattern is the perfect for the gloves loving friends. I am using a cotton DK yarn for these gloves and make the same video.
This tutorial help you easy to understand the design I made how the thumb section and how I working in the thumb again. I added a 3 double crochet stitches in same stitch. The edges I am using a single crochet stitch.

Enjoy this easy granny type fingerless pattern and write about me as a friend. If you want more help so please join my face book page. Write me about the pattern you like and appreciate. You also share me to the email i will help.


Gauge:   (6dc x 3 row = 1 inch)
Size:  medium

Item to be need:
Violet Dk cotton yarn 4ply
Crochet hook 3mm/ D3.25mm
Crochet needle

US term abbreviation:
c.           crochet
ch.         Chain
sc.          Single crochet
dc.         Double crochet
slst.       Slip stitch
st.          Stitch
sts.        Stitches
rnd.       Round
rpt.       Repeat
sp.        Space
sps.       Spaces
skp.      Skip


Special stitch:  3 double crochet in same stitch (see how to make the stitch)


Pattern:
Cuff:
Rnd1:     ch14, sc in 2nd ch from the hook, sc in each ch across, turn. (13)
Rnd2:     ch1, sc in same st, sc in each st across, turn. (13)
Rnd3-28:   repeat Rnd 2 (13)

Note:   Do not fasten off sew two ends together to form a cuff into the wrong side, slst in
each st across, come out the front and begin the next round by crocheting along the edge
of the cuff to start the hand part of the glove.

Hand:
Work in the round, joining at the end and continue work the same direction.
Rnd1:     ch1, sc in same st, pick up 27 sc more along the edge, slst to join in 1st sc. (28)
Pattern round:
Rnd2:       ch3 (as count dc), 2 dc into the same st, *skip next st, 3 dc in next st*, rpt *to*
                 around,  slst to join in 1st st, slst in next 2 sts, slst in next sp.
Rnd3:       into sp ch3 (as count dc), 2dc in same sp, 3 dc in next sp, rpt 3 dc in each sp around,
                 slst to join in 1st st, slst in next 2 sts, slst in next sp.
Rnd4-5:    repeat Rnd3.
Make thumb:
Rnd6:      into sp ch3 (as count dc), 2dc in same sp, 3 dc in each next 3 sps, skip next 3 sps for 
                the thumb, 3dc in next sp, rpt 3dc in each of the next remaining sps, slst to join in 
                1st st, slst in next 2 sts, slst in next sp.
Rnd7-10:  repeat Rnd3.
Rnd10-11:    ch1, sc in same st, sc in each st around, slst to join in 1st sc. Fasten off
Working  around the thumb:
Rnd1:        join yarn into the corner sp facing you, into sp ch3 (as count dc), 2dc in same sp,
                 3 dc in each of next 3 sps, 3dc into the opposite side corner sp, slst to join in 1st st.
Rnd2-3:    ch1, sc in same st, sc in each st around, slst to join in 1st sc.
 Fasten off weave in end.

You May also like:


Saturday, 25 March 2017

Flower Granny Square Design


Today I made a new flower crocheted square design posting in my blog. This is originally share with the same video. This easy tutorial help for the beginner crocheters and who learn and teach for the beautiful design’s for the home decoration. I bring always some easy way to create with my own written instruction I made for my friends and wavers who always join me and follow me. I am very thankful for all of them who support me in their web and share my pattern in their own famous and globally share to others.


This Flower square I made for my own idea, I am using a special cluster US terms 3 in complete double crochet stitch in working in the same stitch. I made the same tutorial for help that how I making the crocheted flower square. I added the two colors in this pattern when you see the video tutorial how I added a new color and can see how to make the flower to convert in the square.
You should make some of the squares in one color or in two then join to gather you can easy to make a  baby blanket ,square purse, square table cover and have to use in many other ways, if you want to more bigger the pattern so, repeat the 3rd round in 2 or 3 more rows, this way your square look more bigger than this one.


This Flower Granny helps for you to how can making the different colors to join and we create  simple and new idea for home decoration. You can add some more colors and make different items for the home decorate items. I hope you will be enjoy this easy pattern and follow me, I making same videos for help to you, if I have a mistake in my speaking so, forget it! And inform me I will try to improve.

favorite the pattern to your  Revelry queue.


Gauge: (5dc x 2 row = 1inch)

Item to be need:
Two colors DK cotton light 4 ply
Crochet hook 3mm/D 3.25 US
Crochet needle

US Terms Abbreviations:
c.           crochet
ch.         chain
sc.          single crochet
dc.         double crochet
slst.       slip stitch
st.          stitch
sts.        stitches
rnd.       round
cl.         Cluster
rpt         repeat
ch-sp     chain space

Special stitch:  3 in complete double crochet cluster stitch (see how to make the cluster stitch)


Pattern:

Start with a magic circle.(see the video tutrial)
(Ch2 as count)

Color A:
Rnd1:     into a magic circle we make 1st cl (see Abbrev for the cluster stitch)
              Ch2, cl, rpt total 8 times, Join in the 1st st. (8 clusters)
Color B:
(Ch2 as count)
Rnd2:     into 1st ch-sp make (cl, ch2, cl),*ch2, (cl, ch2, cl)* rpt * to * in each sp around,
               Slst to join in the 1st st.
Note:   in the next round we make 4 corners for the square shape.
Color A:   
(Ch2 as count)
Rnd3:     (make 1st corner) into 1st ch- sp make (cl, ch2, cl),* ch2, cl in next ch-sp, ch2 (cl, ch2)
                rpt 2 more, make 2nd corner in next ch-sp (cl, ch2, cl)*rpt *to* 4 times around,

                slst to join in 1st st. Fasten off weave in end


See More Design:


Friday, 17 March 2017

Crochet New Baby Sandal


Today I am showing about my newly project crochet new baby sandal with video tutorial. This is the baby sandals for 3 to 6 month baby size. I am using for this pattern the two colors yellow and dark green both of the colors are the same weight DK double knitting 4 ply and using crochet hook 3mm/US D3.25 mm. the colors am I using only for the little girls its bright and attractive for the babies and both are good combo.

Part-1 video


This easy pairs of sandals design I made for my little niece  she looks like beautiful and lovely, the crochet things always my best choice for the little babies, this pattern is so nice and easy I think the 
crochet block stitch are the best choice for the front I made it. The tutorial can help you easy to understand the pattern and I think you can see more designs for yours little ones with the same video tutorial.

Part-2 video

You think about the pattern how to make the baby sandals. It is very simple and easy to crochet. I am using a double crochet stitch, half double crochet stitch, and single crochet stitch. First making the sole for your desire length and size, it can be easy to adjust in other sizes; just you make the sole for the fit size as you want, then make the back side. After that make the block stitch front flap for the sandal and then join into both of the sides.


This is the lovely and adorable crochet new baby sandal made for 3 to 6 month. Just loving and nice colors combo to make the beautiful pattern. I am feeling very good to see my friend like my designs and see the videos too. I am tried to bring the easy pattern for the beginners and you can understand very easy.

click the below link for download the pattern.

favorite the sandal pattern to your  Revelry queue.

Try to this free pattern and hope you will enjoy the with the *video tutorial*


Gauge:   5dc x 2 row = 1 inch
Sole Length:  4.5 inch
Size:     3 – 6 months

Item to be need:
Yarn: 
Color A. yellow DK double knitting yarn 4 ply
Color B. dark green DK double knitting yarn 4 ply
Crochet hook. 3mm/ US D 3.25 mm
Crochet needle
Scissor

US Term Abbreviation:
Sc.            Single crochet
dc.            Double crochet
St.            Stitch
Sts.           Stitches
Rep.          Repeat
Slst.          Slip stitch
Rnd.         Round
Beg.         Beginning
Ch-sp.      Chain space
Special stitch:  (block stitch). ( Crochet- Crosia) How to make the block stitch

Pattern:
Sole:


(Ch3 as count a dc)
Color A:
Rnd1:     ch15, 2dc in 4th ch from hook, 1dc in next 10, 7dc in last ch, work in opposite
                Side, 1dc in 10 sts, 3dc in last st, slst to join in top of the beg ch3. (33)
Rnd2:     ch3, dc in same st, 2dc in next 2 sts, 1dc in next 10 sts, 2dc in each st into last 7 sts 
               group,Work in opposite side, 1dcin next 10 sts, 2 dc in each last 3 sts, slst to join in 
               top of the beg ch3. (46)
Rnd3:     ch1, sc in same st, 2 sc in next st, (sc, 2 sc) repeat 3 more time, 1sc in next 3 sts, 1hdc 
               in next 3 sts, 1dc in next 4 sts, (dc, 2dc ) repeat 7 time in last 14 sts, work in opposite 
               side, 1dc in 4 sts, 1hdc in next 3 sts, 1sc in next 3sts, (sc, 2 sc) repeat 3 time in last 
               6 sts, slst to join in top of the beg ch3. (59). Fasten off
Make back part:


Color B:
Rnd1:        join yarn into st marker, ch1, sc in same st, sc in next 19 sts across to the st marker,
                  turn. (20)
Rnd2-8:    sc in each st across, turn. (20). Do not fasten off make ch lace.
Make ch-lace:
Make ch 35 in both corners into the back side. Fasten off
Make block stitch front strap:
Color A:
Rnd1:     ch21, slst in 6th ch from hook, ch2, skip 2 ch, slst in next ch, repeat to the end.
Note:     Do not cut the yarn and join next color, always hold the 2nd color in hand when you
working in next color.
Color B:
Rnd2:     ch3, 3dc in ch-sp, 3dc in each ch-sp across. Change next color and turn.
Color A:
Rnd3:     ch3, *skip 3 dc sts, sc in next middle, ch2, skip 3dc sts, sc in next middle* repeat
               *to *across. Change next color and turn.
Color B:
Rnd4:     repeat (Rnd 2)
Color A:
Rnd5:     repeat (Rnd 3). Fasten off
Sew the flap on the front of the sole.


Sewing:   skip 4 sts from back side to the front and marker the same point in both of the side,
Sewing the flap to the sole,* sew into the inside using only back loop and leave the front loop

out, use slst in each st* then join the other side to the same. Fasten off weave in end.


Monday, 13 March 2017

Crochet Flower Design


Spring season is starting and the small cute flowers blooming everywhere butterflies also surrounding in the garden and attractive the small flowers too. The colorful flowers attract everyone to their smell and want a lot of time to spend in the garden. I also take my yarn and crochet hook and making there’s making some flower design.
I bring for you a bunch of flower design and verity of small cute flowers it’s using for the home decorating you will try to this and making for your home so beautiful and colorful. You can also using in the head band, sew on the frock and baby hats and use in other baby items. Flowers are very important part of our daily life such as we decorate our houses for the birthday parties or many other functions we are celebrating in home, so, using any colors of yarn and make to try out this small creation.


All the flowers design are made in different pattern and using in different colors in them. I am using single crochet, double crochet; treble crochet stitches the US terminology all my work done. You have to I am using worsted normal weight yarn and 3mm crochet hook for the entire flowers pattern. You can use any of crochet yarn and the same hook to using for this. Their so simple and cute designs so do not miss and try to make and decorate your home in the beautiful flowers.
you click and see on top right and find how to make  (crochet-crosia flower designs) 


I tried the small video clip for you, if you are the beginner of the crocheting this video can help and you can understand more about how we making the small flowers. I want to try more new and different colors and verity for you it can help you more perfect in the crochet world. So don’t forget my pattern and watching the* video tutorial*

Item:
DK yarn 4 ply
Hook:   3mm/ D 3.25
US Terms
Abbreviations:
C.              crochet
St.             Stitch
Sts.           Stitches
Rep.         Repeat
Slst.          Slip stitch
Sc.            Single crochet
dc.            Double crochet
Trc.          Treble crochet


Flower 1 pink: (see the video tutorial)


Pattern:
Make a magic circle.
Round1:    15 sc into a magic circle, slst to join in sc.
Round2:    ch2, skip 2sts, sc in next st, rep (sc, ch2, skip 2sts) 4 more time around,
                    slst to join in 1st space.
Work into the petal.
Round3:     into ch-sp (ch4, 4 trc, ch4, slst in same sp), slst in next ch- sp, rep (ch4, 4 trc,
                    ch4, slst) in each sp around, slst to join. Fasten off weave in end.


Flower 2 Brown:


Pattern:
Round1:     ch3, slst to join in 1st ch and make a small ring.
Round2:     15 hdc into a ring, slst to join in hdc.
Round3:     ch3, skip 2 sts, slst in next st, rep (ch3, skip 2 sts, slst in next st) around,
                    at the end slst to join into 1st space.
Work into the petal.
Round4:     into ch-sp(ch2, 2dc, 2trc, ch2,2trc,2dc,ch2, slst in same sp), slst in next ch- sp,
                    rep (ch2, 2dc, 2trc, ch2, 2trc, 2dc, ch2, slst) in each sp around, slst to join.
                    Fasten off and weave in end.


Flower 3 small light green:


Pattern:
Round1:     ch4, slst to join in 1st ch and make a small ring.
Round2:     into a ring ch2, 5dc, sc, slst, repeats (ch2, 5dc, sc, slst ) 3 more time into same ring,
                   at the end slst to join. Fasten off and weave in end.


Flower 4 pink and purple:


Pattern:
Round1:     18 sc into a magic circle, slst to join.
Change 2nd color:
Round2:     ch4, skip 2 sts, slst in next st, rep (ch4, skip 2 sts, slst in next st) around,
                    slst to join.
Work into the petal.
Round3:     into ch-sp (2sc, 2hdc, 1dc, 2hdc, 2sc, slst in same sp), slst in next ch- sp, rep
                    (2sc, 2hdc, 1dc, 2hdc, 2sc, slst) in each sp around, slst to join.
                    Fasten off weave in end.


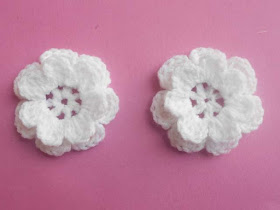
Flower 5: white 2 layers Flowers:


Pattern: 
Round1:     ch3, slst to join in 1st ch and make a small ring.
Roudn2:     into ring ch4, 1dc, ch1, 1dc rep 5 more time, slst to join in 3rd ch.
                    Make total (7ch-sp).
Work into the petal.
Round3:     into ch-sp (ch2, 5dc, ch2, slst in same sp), slst in next ch-sp, rep (ch2, 5dc,
                   ch2, slst) in each next 6 sps around, slst to join, do not fasten off and
                   working into the 2nd layer.
Make the 2nd layer.
Round1:     slst into the post of the dc in front side, ch1, slst in next dc post, rep (ch1,
slst in next dc post) around, slst in 1st ch-sp.
Work into the petal.
Round2:     into ch-sp (ch2, 3dc, ch2, slst in same sp), slst in next ch- sp, rep (ch2, 3dc,
                    ch2, slst) in each ch-sp around, slst to join. Fasten off weave in end.

(see the two layers flower video tutorial)


Flower 6 yellow:


Pattern:
Make a magic circle.
Round1:     15 sc into a magic circle. Slst to join.
Round2:     ch2, skip 2 sts, slst in next st,rep (ch2, skip 2 sts, slst in next st) around,
                    slst to join.
Round3:     into ch-sp (slst, ch1, 4dc,sc in same sp), slst in next ch- sp, rep(slst, ch1, 4dc,sc)
                    in each ch-sp around, slst to join. Fasten off weave in end.


you may also like


Monday, 6 March 2017

Pretty Crocheted Coasters Design


Although in my mind always different design but I generally attempted to do that for you some new, simple example and design to learn and teach you with in written instruction, today I making the simple coaster design with video tutorial. I teach you a basic crochet coaster design for beginner. Where you can use in this example different shading in light of the fact that the shading blend is fundamental thing that you will make a large portion of lovely creation in crochet design and you can make a list of different colors and shade. You can make easily in a large and or a little size.
You can utilize easily use in a different area like to protect your wooden table ,arrange these in a stack for keeping the bottom of your glasses and cups, for using to covers the dish and more different as you need. You can make it in a different shape like square and octagon etc. Use it your own particular personality here.


This pretty coaster design call for worsted medium weight yarn and 3mm or US D3.25 mm crochet hook. I am using a double crochet stitch and cluster stitch means (2 incomplete double crochet), a single crochet stitch too. The video tutorial helps you to how I made the easy and pretty coaster and I want to share the original pattern in my blog. I have no knowledge to making the perfect video but I little tried for my friends who want to learn and teach my design.
I always most welcome for my friends who want to teach and learn the simple design here and I will be making more designs for them in different ways, I also want to try the same video too.
I want to try the best and easy pattern to show you. This helps you to make your home beautiful and perfect. Use any color yarn and crochet hook and crochet some different and colorful coasters for your home decoration. In a hour you can make easy 2 or 3 sample. So try out and see the

 favorite the pattern to your  Revelry queue.

click the below links for the new design.

video tutorial.


Gauge:
5 dc x 3 row = 1 inch
Size:  medium
Items:
Yarn:   worsted 4 ply same weight (16 – 20 stitches = 4 inches)
Crochet hook size:  3 mm/ US 3.25 D hook
Crochet needle
Scissor

US Terms
Abbreviations:
Sc.            Single crochet
dc.            Double crochet
St.            Stitch
Sts.           Stitches
Rep.          Repeat
Slst.          Slip stitch
Rnd.         Round

Special cluster stitch ( yarn over the hook, insert the hook into the stitch, pull up a loop, yarn over pull throw loop, 2 loops on hook, yarn over again and insert the hook into the same stitch, pull up a loop, yarn over and pull throw loops, 3 loops on hook, yarn over and pull throw all loops.

Pattern:
Rnd1:     ch4, slst to join and make a small ring.
Rnd2:     ch3, 11 dc in a ring, slst to join in the beginning 3rd ch. (12)
Rnd3:     ch3, 1dc in same st, 2dcin next st, repeat (2dc in each st )around, slst to join in the
              beginning 3rd ch. (24)
Rnd4:     ch3, 1dc in same st, ch3, skip a st, cluster st in next st(see special cluster stitch),
                Repeat (cluster st, ch3, skip a st) around, slst to join in the beginning 3rd ch.
Rnd5:     ch3, 1dc in each st around, slst to join in the beginning 3rd ch. (48)


Rnd6:     ch1, sc in same st, ch7, skip 2 sts, sc in next st, repeat (sc, ch7, skip 2 sts, sc) around,
               slst to join in the 1st sc.

Rnd7:     9sc in each space around, slst to join. Fasten off weave in end


YOU MAY ALSO LIKE


Saturday, 4 March 2017

Crochet Baby Sock/Slipper


This is a crochet baby socks/slippers are made for the 3-6 month baby size. Socks and slippers are different for the adult who are waking round the house and want their slippers to be thicker and also want to using for the cold season to make their feet warm in the cold season, but the children are very sensitive we always to protect them in the cold and chilly season. It is so important to using the socks and slippers in the house, and the outer most. These baby socks are perfect slippers alternative for any young one. It is so simple and easy to add in the other sizes. The video tutorial helps you to how I made the new and easy way crochet socks/slippers. First time I am making my video and want to teach my friend very clearly to know about the pattern how I created with my mind. They are also adjust you can in many other colors and make it more perfect.


These basic crocheted socks are really easy to crochet. They are worked in single crochet and half double crochet stitch with added to complete the pattern. This is a good option for the people who are new and beginner want to learn and teach first time the simple pattern. These prefect pair fit in 3- 6 month baby and you also can easy to adjust in small and larger size as you want. This video tutorial learn and teach you about the correct pattern, if I have a mistake in my written pattern I would a little try to make the video for my weavers and friends who like and appreciate my design and always thankful  to them who visited and learn.


this is my first video!Many many excuses for the mistake in my video! Cause I have not a perfect experience to making the video. But I will trying to make more perfect and want! You all to improve my courage. Thanks for watching my video tutorial.

Gauge: 5 hdc x 4 row = 1 inch (length toe to heel = 4 inches)
Size:  small
Items:
Yarn:   worsted 4 ply same weight (16 – 20 stitches = 4 inches)
Crochet hook size:  3 mm/ US 3.25 D hook
Crochet needle
Scissor
US Terms
Abbreviations:
Sc.            Single crochet
Hdc.         Half double crochet
dc.            Double crochet
St.            Stitch
Sts.           Stitches
Rep.          Repeat
Slst.          Slip stitch
Rnd.         Round


Pattern:
Color B:
Toe:
Rnd1:       ch7, sc in 2nd ch, sc in next 4 ch, 3 sc in last ch, work in opposite side, sc in next
                 5 sts, 3 sc in last st, slst to join in sc. (16)
Rnd2:       ch1, sc in same st, sc in next 4 sts, 2sc in each 3sts group, work in opposite side,
                 Sc in next 5 sts, 2sc in each 3sts group, slst to join in sc. (22)
Rnd3-6:    ch1, sc in same st, sc in each st around, slst to join in sc. (22)
Color A:
Rnd7-13:     ch1, hdc in same st, hdc in each st around, slst to join in hdc. (22)

Make heel:
Color B:
Rnd1:     join yarn , ch1, sc in same st, sc in next 9 sts across, turn. (10)
Rnd2:     skip 1st st, sc in next 9 sts across, turn. (9)
Rnd3-6:  repeat (Rnd2) (5).
Fasten off

Make top part:
Color A:
Rnd1:       join yarn into the base of the heel facing you, hdc in next st, hdc in each 11 sts
                 across, pick up 5 sc in each into side of the heel, 3 sc in each of the top last round,
                 pick up 5 sc in each of the other side of the heel, slst to join in hdc. (25)
Rnd2-4:   ch1, hdc in same st, hdc in each st around, slst to join in hdc. (25)
Rnd5:       ch1, hdc in same st, hdc in next 10, hdc tog in next, hdc in next 10 sts, hdc tog in
                  Last sts, slst to join. (23)
Rnd6:       ch1, hdc in same st, hdc in next 8, hdc tog in next, hdc in next 10 sts, hdc tog in
                  Last sts, slst to join. (21)
Rnd7:       ch1, hdc in same st, hdc in each st around, slst to join in hdc. (21)


Make the edge:
Work:   join the 2nd color and ch2, skip next st, slst in next st, repeat  (ch2, skip st, slst in
next st) around. Fasten off weave in end.