I made this baby blanket for the
new born to 3 months babies. This blanket I made a granny type afghan baby designs,
often people says this type blanket a baby Afghans blanket, baby shawl and many
other words to use. It is very easy and quick crochet beautiful afghan blanket
for the babies. Every mother wanted to choose best quality things for their
babies and children, but those mothers that she likes and know about the hand
made things she always wants to crocheted things for their babies. I am mother
and also like crocheted things for my own children. The handmade crochet
blankets are the best protected item for the newborn babies; it is very thick
and warmer.

I teach u some easy way to making
the crochet baby afghan blanket. Someone started it for the beginner, in this
way first making many chins and start their work. I made this blanket stared in
the middle and work a square shape or granny, I made this one a small size, but
you making larger as you want. I explain about the changing colors in the pattern.
The edges of the blanket make the picot stitch; you also can make the edges
another stitches like, shell stitch.


It is very simple and easy way to
crochet the blankets. it is not very difficult work,it is very easy to understand and the step by
step picture tutorial guide you. You have a lot of fun to crochet this blanket. So, start
and enjoy to making the blanket for your babies and keep it warm.find the other Square pattern.
Size: small for new born to 3 months baby
Special st: picot st: make a single crochet stitch, make ch3, and slip


Size: small for new born to 3 months baby
Gauge: Length x width = 27 inches
16 to 20 stitches = 4 inches
Item to be need:
Two colors (cream and shaded
light brown) worsted yarn 4ply
Crochet needle
Hook size. 3mm / US D 3.25mm
US Terms
ABBREVIATIONS:
c. Crochet
ch. Chain
sc Single crochet
dc. Double crochet
sts. Stitches
st. Stitch
slst Slip stitches
sp Space
sp Space
Special st: picot st: make a single crochet stitch, make ch3, and slip
stitch into the Front two
loops in the same single crochet.

Pattern:

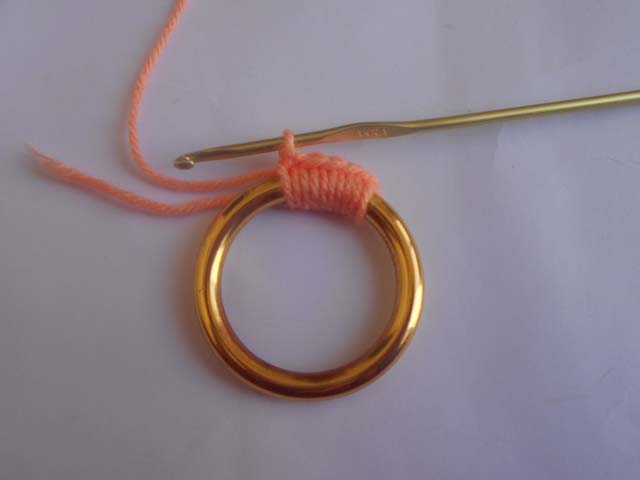
First make a
magic circle.
Rnd1: into
the magic circle, ch3 (count as dc), 2dc, ch2, 3dc, repeat (3dc, ch2,
3dc) total (4 times), at the end slst to join in top of ch3, slst in next 2 sts,
3dc) total (4 times), at the end slst to join in top of ch3, slst in next 2 sts,
slst into the next corner sp.(see pic )

Note: remember
always starts a new round into the corner.
If you want to changing Colors
don’t slst into 2sts, only slst
at the end, cut the yarn. And then join a new color.
Rnd2: into
the corner, (ch3 (count as dc), 2dc, ch2, 3dc), ch2, work into
the next corner, (3dc, ch2, 3dc),ch2, repeat
[(3dc, ch2, 3dc),ch2]
around,total (4 times), at the end slst to join in top of
ch3, slst in next
2 sts, slst into the next corner sp.(see pic )

Rnd3: into
the corner, (ch3 (count as dc), 2dc, ch2, 3dc), ch2, 3dc into next
ch2 space, Work into next corner, (3dc, ch2,
3dc), repeat [(3dc, ch2,
3dc, into corner),ch2, 3dc in next ch2 space] around, total (4 times) at
the end slst to join in top of ch3,
slst in next 2 sts, slst into the next
corner sp.(see pic )
corner sp.(see pic )

Rnd4: into
the corner, (ch3 (count as dc), 2dc, ch2, 3dc), ch2, 3dc into next ch2
space, ch2, 3dc in next ch2 space, ch2, Work into
next corner, (3dc, ch2,
3dc), repeat [(3dc, ch2, 3dc, into corner),ch2, 3dc
in next ch2 space,ch2,
3dc in next ch2 space, ch2], around total (4 times), at the
end slst to join
in top of ch3, slst in next 2 sts, slst into the next corner sp.(see pic)

Rnd5-23: continue the pattern to the end.

Note: when you
change the next color, always change
the Color after the joining, don’t slst
into 2sts, only slst
at the end of the round, cut the yarn. And then join a
new
color, continue work as you want to large the size of
the blanket.

Rnd24: ch1, sc into same st, sc in next 3dc sts,
2sc into ch2 space, repeat
(sc into 3dc sts, 2sc into ch2 space) at the
end slst to join.
Make the edges:

Rnd25: ch1,
sc into same st, make a picot st (ch3 slst into same sc front 2loops),
sc into next 3sts,repeat [(sc into
next st and make a picot st ch3 slst into same
sc front 2loops),sc in next 3sts], around the blanket. fasten off
sc front 2loops),sc in next 3sts], around the blanket. fasten off
.