


If you have any problem to understand the pattern, so, please share with me at the comment, I will help as soon as possible. For more help watch the video tutorial. Follow my YouTube channel for more beautiful crochet tutorial
we use leftover wool for the pattern of Roses. Tablemat, Pouch, Wall hanging and for more home decors. all the links on left of the screen.
Item to be need:
DK Weight Wool 4ply (4 hdc x 2.5 Rows = 1 inch)
Crochet hook size 4mm US (G)
Size: Mobile Phone Cover
US Terms Abbreviation
· C. crochet
· Ch. Chain
· Sc. Single crochet
· Hdc. Half double crochet
· Dc. Double crochet
· Trb. Treble crochet
Dtr. Double treble crochet
· Sl st. slip stitch
· St. stitch
· Sts. Stitches
· Rnd. Round
· Sp. Space
· Skp. Skip/miss
· Rpt. repeat
Mobile phone cover:
Take a plastic Ring 2 inches, then start a square into ring,

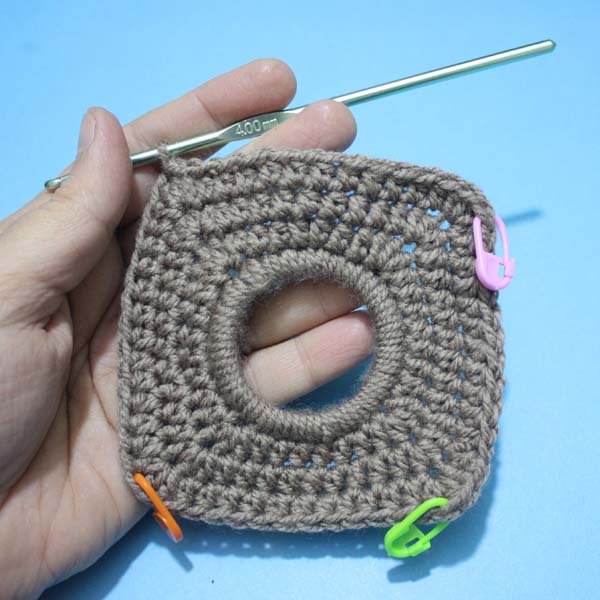
Into the ring make 32 sc for more help watch video tutorial.
Now divide the stitches in 4 equal parts for square design.(8 + 8 + 8 + 8)
Round1: ch1 don’t count as a stitch, make first corner 3hdc into same st,* make
1 hdc in each next 7 sts, make corner 3hdc into next st*, Repeat from * to * around,
do slip st to join into 1st hdc , slip st into next middle st of corner. (4 corner square)
Round2- start next round into middle st of corner, ch1 don’t count as stitch,
make corner 3hdc into middle st of corner, *make 1 hdc in each next 9 sts, make
corner 3 hdc into middle st of corner*, Repeat from * to * around, do slip st to join
into 1st hdc , slip st into next middle st of corner. (4 corner square)
Round3- start next round into middle st of corner, ch1 don’t count as stitch,
make corner 3hdc into middle st of corner, *make 1 hdc in each next 11 sts,
make corner 3 hdc into middle st of corner*, Repeat from * to * around, do slip st
to join into 1st hdc , slip st into next middle st of corner. (4 corner square)
Now stop the increasing of granny square, I am making the mobile phone cover,
if you want to make more large size like a tablets cover, So, repeat and continue
the increasing of square we have done in the round 3.
Start the phone case/cover:
Round1- start round into the same st, ch1, don’t count as stitch, make hdc in each
next 15 stitches, Turn work. (15 hdc)
Round2- ch1, don’t count as stitch, make hdc into back loop in each next
15 stitches, and Turn work. (15 hdc)
Round3- 30: Repeat and Follow Round 2 of phone case.
Measurement Approx. from Round 1 -30 of phone case 10.5 inches/ 27 cm
If you want to make long size so repeat 2 or 3 more Rows. Then stop and sew
to join the Sides of phone case/cover.
I am making to join the sides of cover with a single crochet. So, fold the cover,
leave the upper square and join the sides, join and attach the 2nd color yarn,
then start join and make a single crochet both of edging and close the opening
of side, make a sc into side top to down, then make 3 sc into corner, then make
a sc in each 14 sc into bottom sts, make 3 sc into corner, then start to joining
the 2nd Sides of phone cover like the other side we worked before, make sc
down to upward, then make a sc into next 14 sts of square, make 3 sc into corner,
then make a sc top line 14 sts, 3 sc into corner, then make 1 sc in each top
to down 14 sts of square, then finish off with a slip st. for more help watch
What kind of ring do you use? What size is it? Thank you
ReplyDelete2 inches plastic ring i will make a picture. you r so welcome
DeleteThank you so much. I don't see a picture.
Deletewe added 2 pictures watch the video i show the ring in the video tutorial
Delete